Edit Receipt Header and Transaction Descriptions
Financial Management > Revenue Collections > Change Receipt > New
The Change Receipt process has been enhanced to let you edit the header and transaction descriptions on a posted receipt.
Follow these steps:
- Navigate to Financial Management > Revenue Collections > Change Receipt.
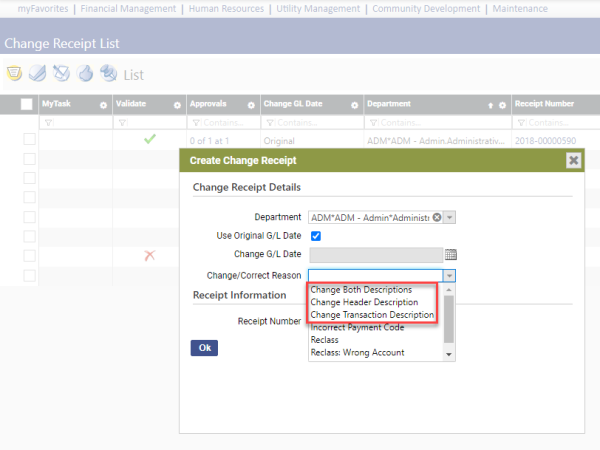
- Click New. The Create Change Receipt popup displays.
-
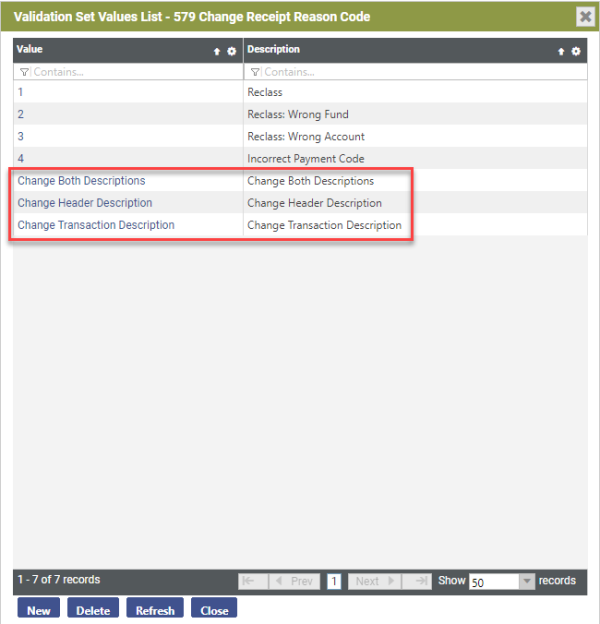
From the Change/Correct Reason dropdown, select whether to Change Transaction Description, Change Header Description or Change Both Descriptions:
-
Note: These selections come from validation set 579 Change Receipt Reason Code. If you need to add these selections to the validation set, hold down the <Ctrl> key, and click in the Change/Correct Reason field:
- After making your selections on the Create Change Receipt popup, click OK. The Change Receipt Entry page displays.
-
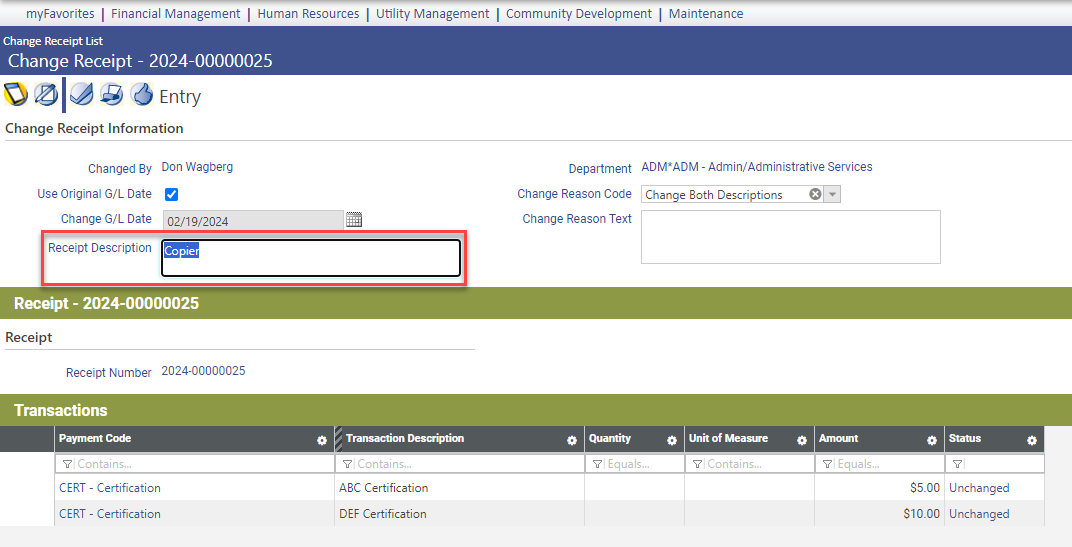
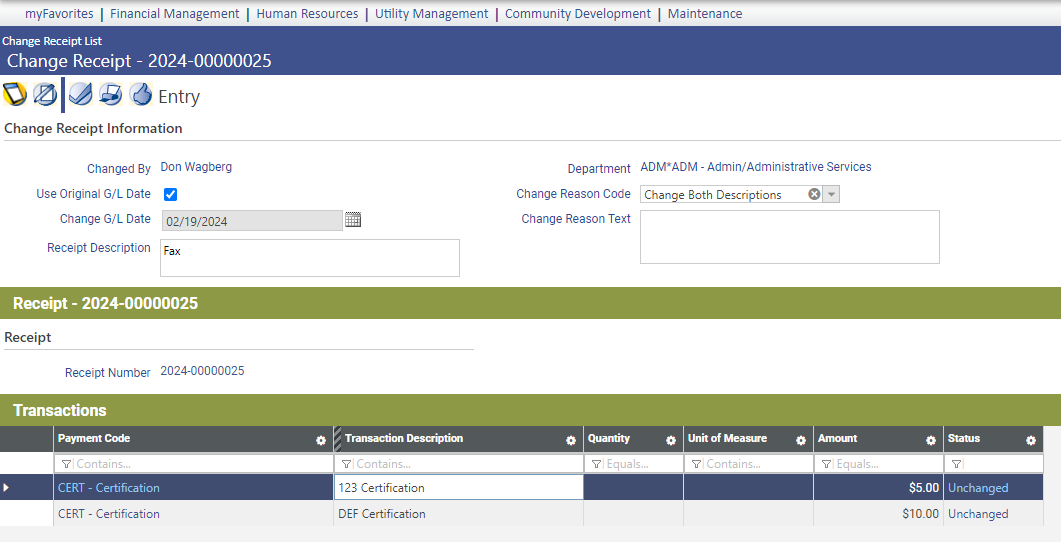
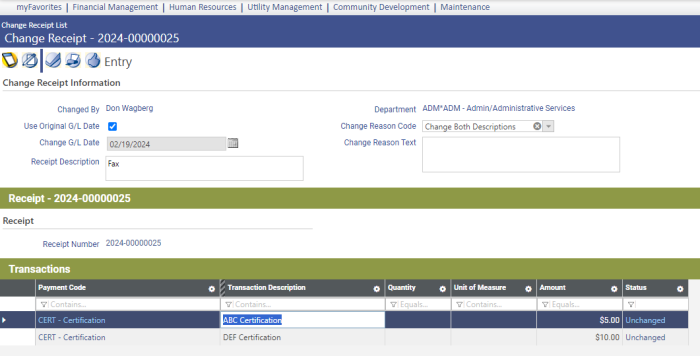
Use the new Receipt Description field to edit the receipt header:

- Click Save.
-
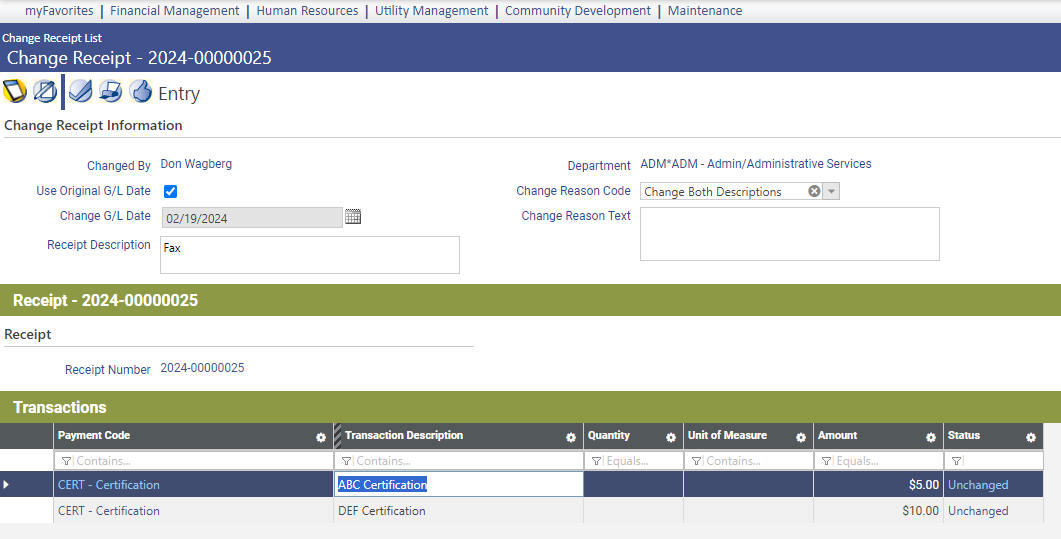
In the Transactions table, double-click the Transaction Description to edit it:
-
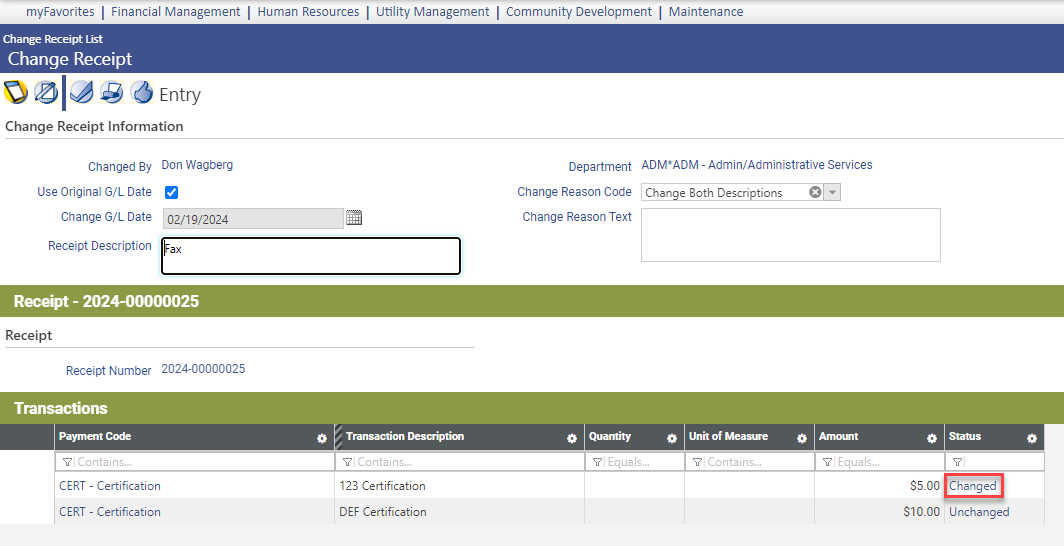
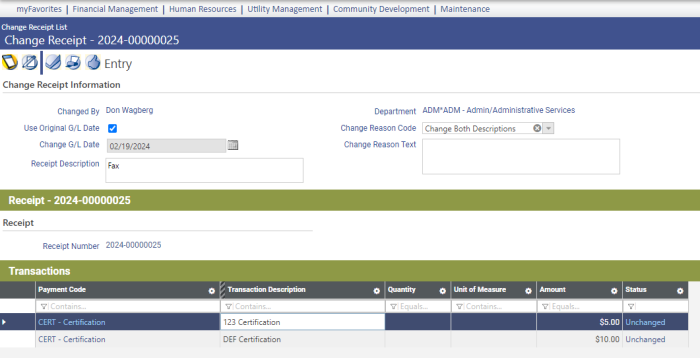
Press <Enter> to save:

Note the Status column displays Changed.
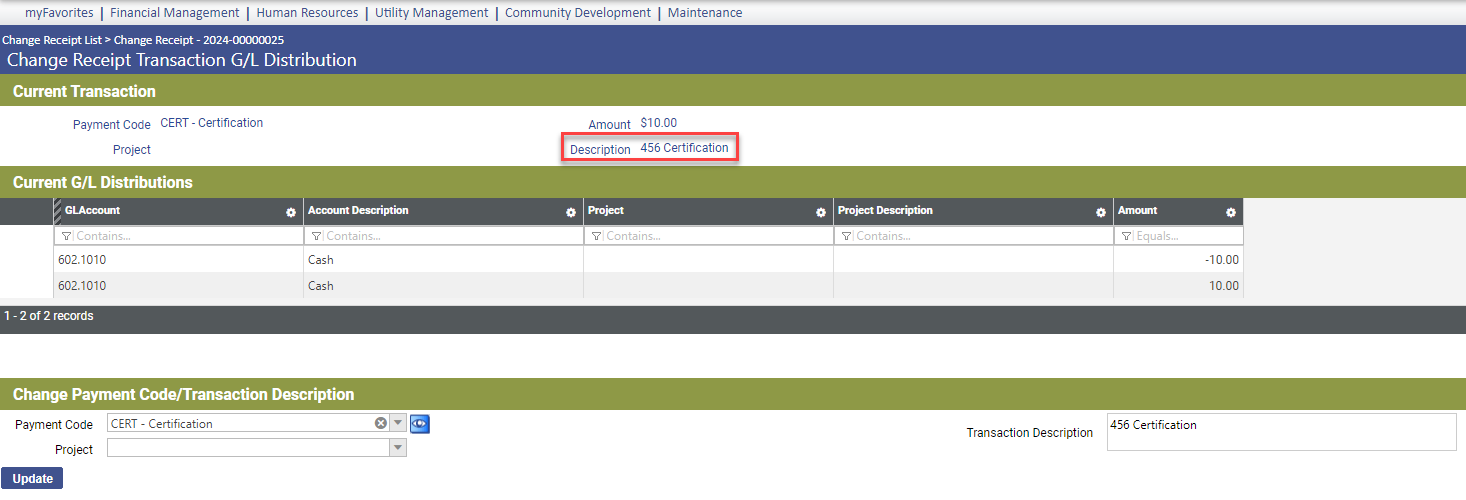
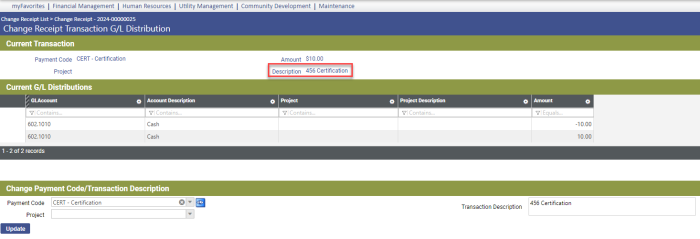
Another way to edit the transaction description is to click the Payment Code in the Transactions table. The Change Receipt Transaction G/L Distribution page displays. Under the Change Payment Code/Transaction Description header, edit the entry in the new Transaction Description field, and click Update:
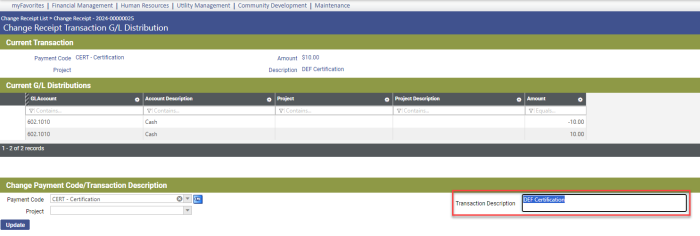
The Description under the Current Transaction header changes accordingly:
-
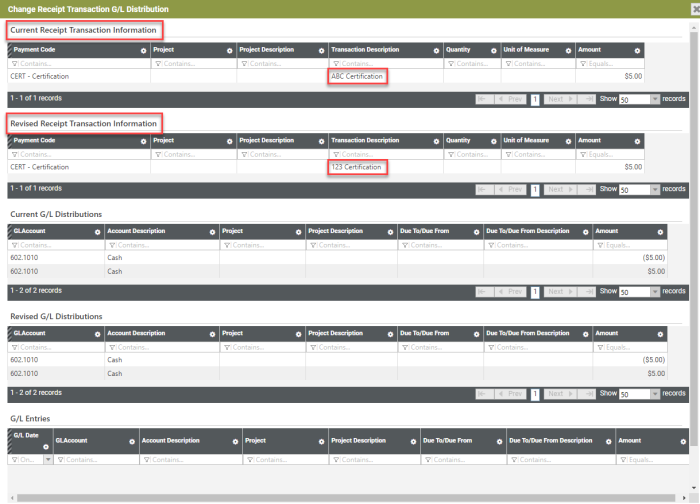
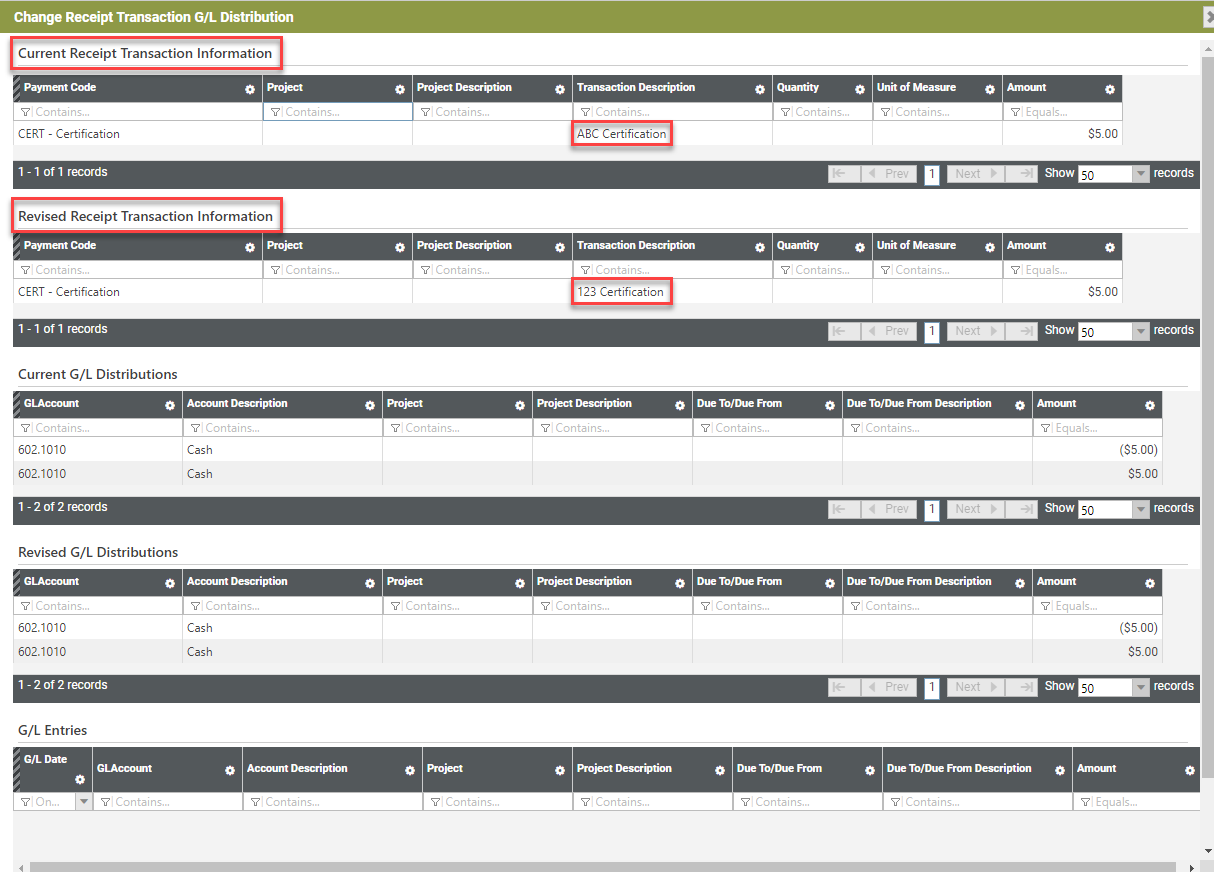
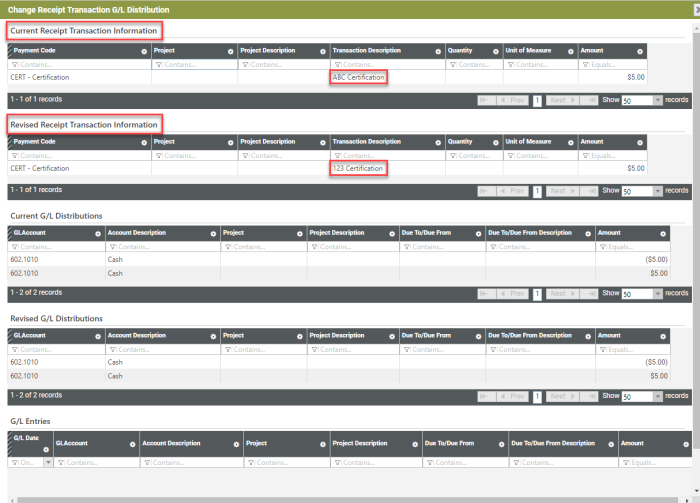
To review a transaction edit, click the appropriate link in the Status column of the Transactions table. The Change Receipt Transaction G/L Distribution page displays, containing current and revised receipt transaction tables:
-
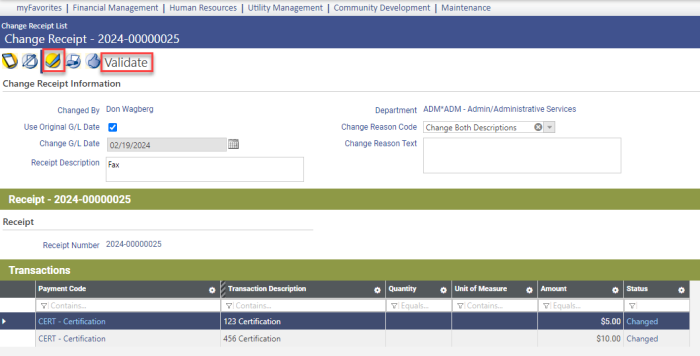
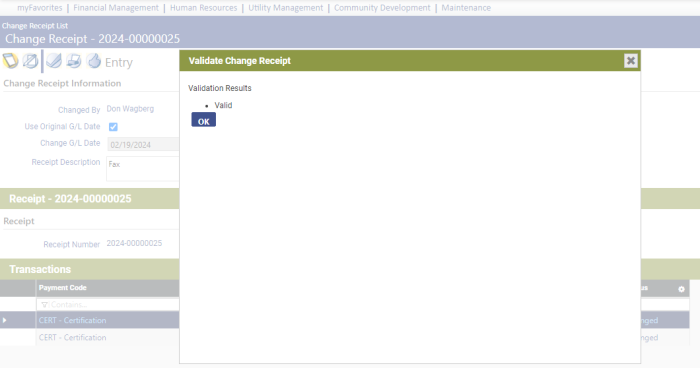
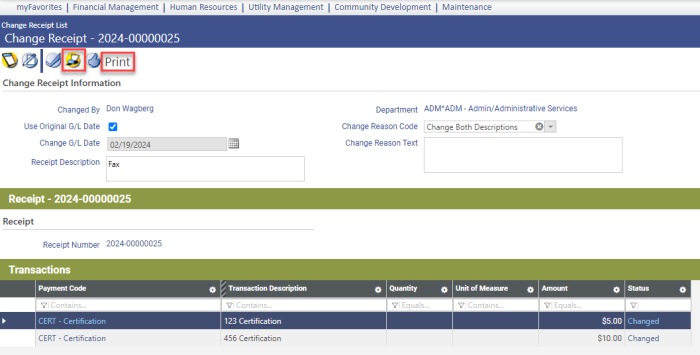
After editing descriptions, validate the receipt from the Change Receipt page:
-
Print the edit listing:
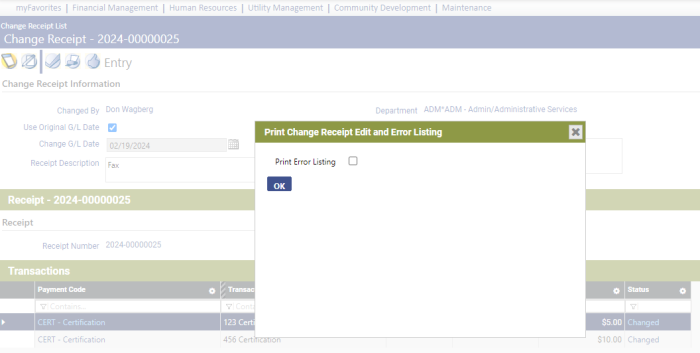
-
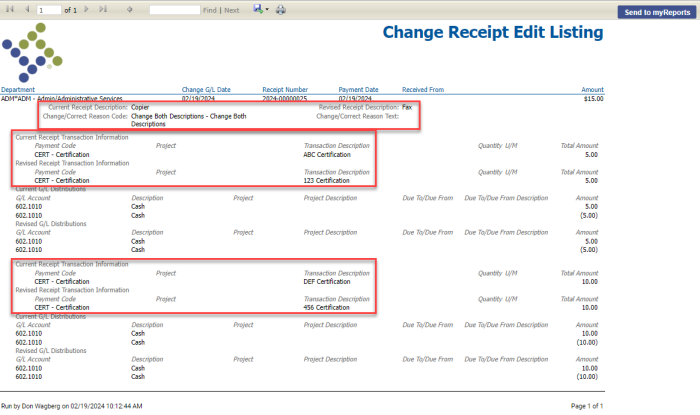
Clicking OK from the Print Change Receipt Edit and Error Listing popup displays the Change Receipt Edit Listing. The listing shows the current and revised receipt descriptions:
-
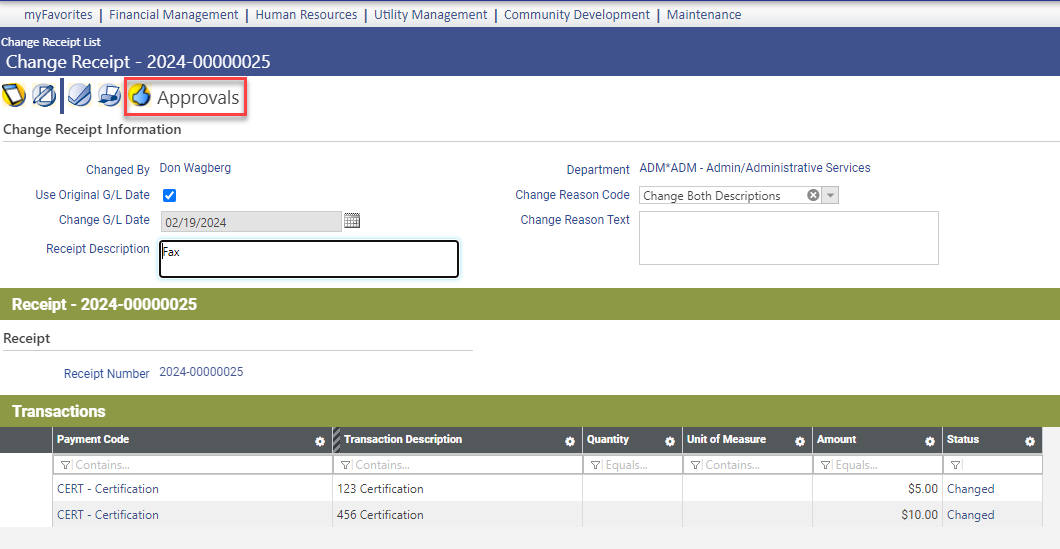
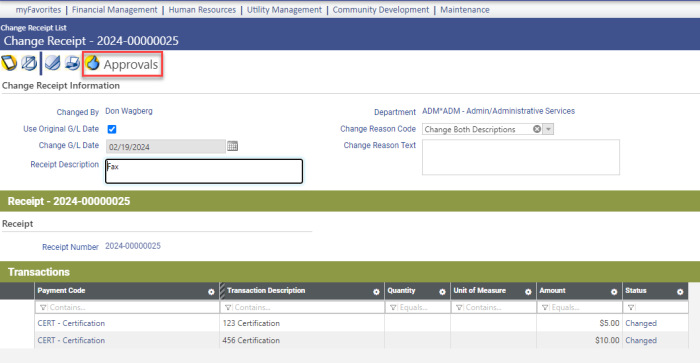
Run the receipt through the approvals process:
-
Post the receipt:

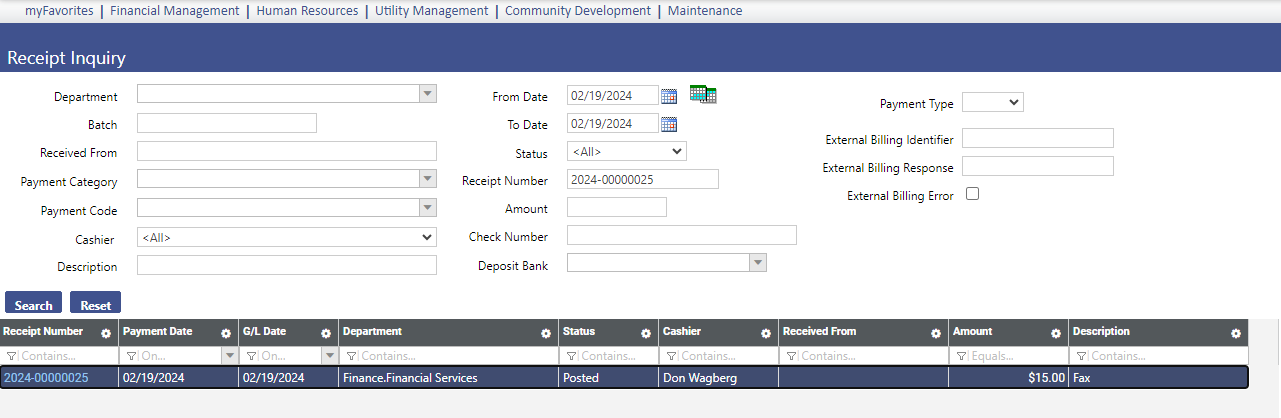
- Once the receipt is posted, the new header and transaction descriptions display in applicable reports and inquiries; for example, navigate to Financial Management > Inquiries > Revenue Collections > Receipts.
-
Search for the receipt:
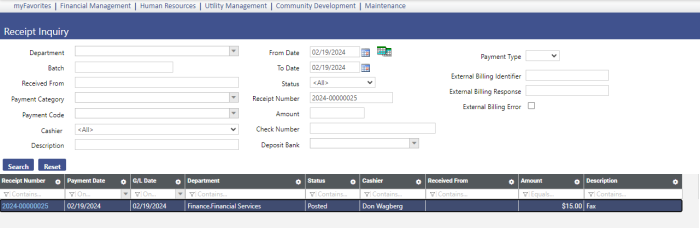
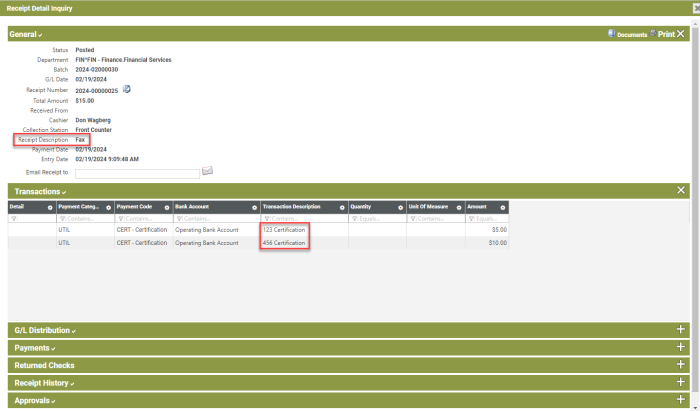
-
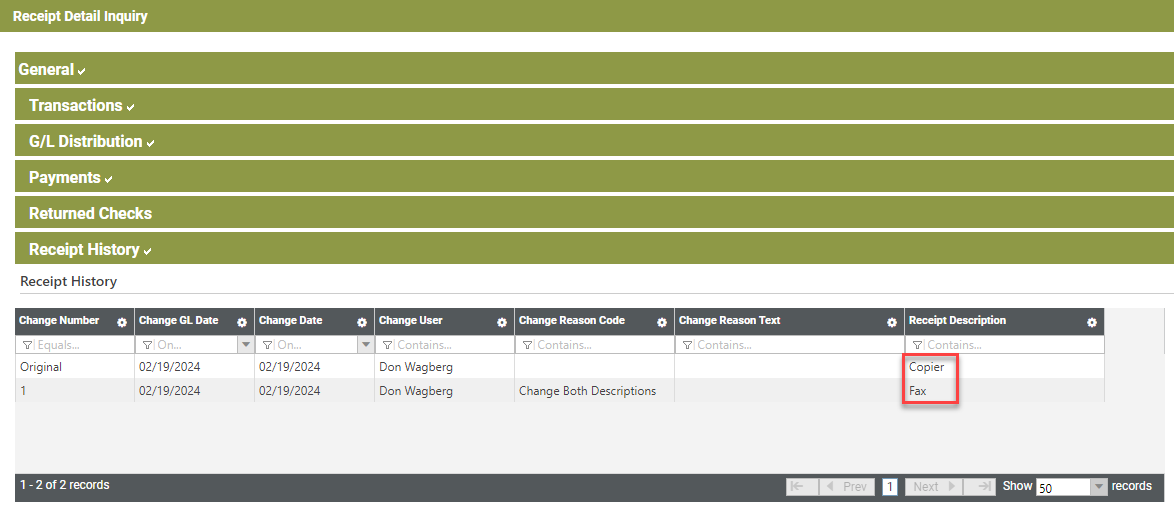
Click the Receipt Number. The Receipt Detail Inquiry popup displays. showing the new header description in the General section and the new transaction descriptions in the Transactions section:
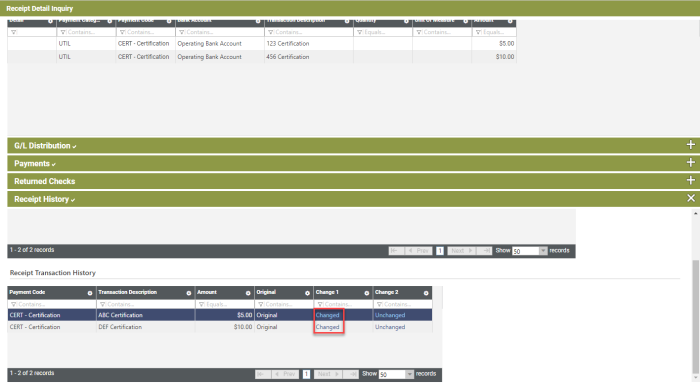
In the Receipt History section, the original and revised header descriptions display in the Receipt History table:
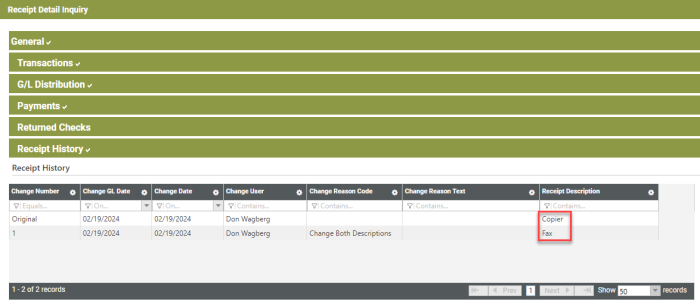
The original receipt transaction descriptions display in the Receipt Transactions History table. To view the history of a transaction description, click the Changed link: